Mini Cornhole Boards: A Fall Festival Touch for Your HO Layout
- Brittany
- Sep 29
- 3 min read

As the leaves turn vibrant shades of orange and gold, the crisp air invites us outdoors. Fall is the season for festivals, friendly games, and cozy gatherings. This year, add a unique touch to your HO scale train layout with charming mini cornhole boards. This simple DIY project not only enhances your display but also captures the spirit of autumn festivities. Let’s explore how to create these delightful additions!
Gathering Your Materials
To start this project, you’ll need a few basic materials. Begin with a flat piece of cardboard, such as an old cereal box. A section measuring approximately 1x1 inch is ample for creating your cornhole boards. An art mat for cutting will also be beneficial, and you can find one at a local dollar store. You'll also need glue, Elmer's or Mod Podge is fine, and paints.
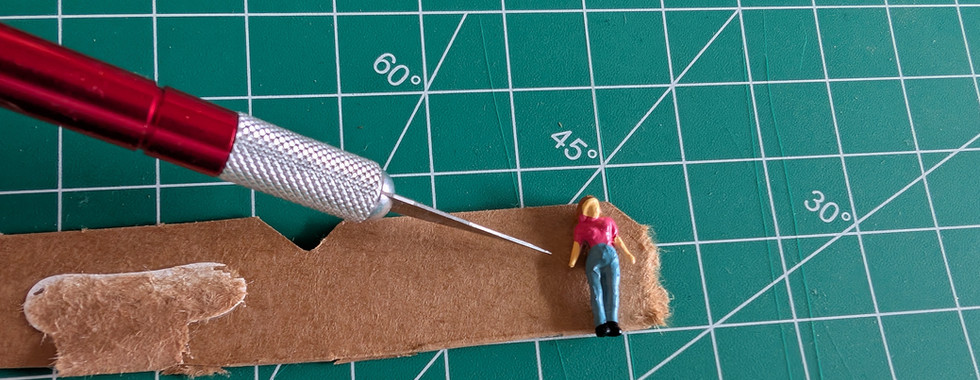
Next, take a figure from your HO scale collection and position it beside the cardboard for size reference. A full-sized cornhole board is typically a little taller than a person's waist. Keeping this in mind will help you plan your dimensions accurately.
Cutting the Cornhole Boards
Once you have your size reference, cut the cardboard. You’ll need one piece for the face of the cornhole board, a smaller rectangle for the angled support, and two smaller rectangles for side support.
After cutting, it’s time to bring some color to your boards! I painted mine a warm ochre, which evokes the essence of fall. To ensure the cardboard remains sturdy, apply a layer of Mod Podge. Once dry, place the board on a cardboard box and drill holes through it by hand. Drilling all the way through will prevent fraying and tearing.
Drilling for Stability
When drilling, begin with the smallest drill bit you can find. Carefully drill a hole, then gradually switch to larger bits until you reach a size of 1/8 inch. It’s important to start small; using a larger bit initially can cause tearing or bending, which is something we want to avoid!
After drilling the holes, it’s time to assemble your board. This part is straightforward: use Elmer's glue to attach the smaller rectangles, positioning them carefully with tweezers. This method ensures that your cornhole board is sturdy and secure.
Crafting the Bean Bags
With the boards ready, it is time to craft the bean bags. For this, I used Sculpey clay. Take a small amount of clay and roll it flat using the handle of your X-Acto knife. Cut the clay into pieces that resemble bean bags, remembering that they should be about hand-sized in HO scale.
To check accuracy, use an HO-sized figure as a size reference next to the clay. After cutting your clay, gently move the pieces to a sheet of parchment paper using the blade of the knife and tweezers.
Bake the clay at 275°F for around 3 minutes, watching closely to prevent burning. Once cooled, paint three squares red and three blue (or whatever colors you desire) to complete your bean bags. A colorful set of bean bags can really enhance the vividness of your display.
A Quick and Fun Project
I completed this entire project in about two hours, and I had most materials at home! If you’re out of clay, you can easily cut bean bags from cardboard instead. These charming additions will breathe life into your fall-themed display, making it feel vibrant and inviting.

Bringing the Festive Spirit to Life
Creating mini cornhole boards for your HO scale train layout is a fun and creative way to embrace the fall season. This project adds a playful element to your display, allowing you to celebrate autumn festivities in style.
Whether hosting a fall gathering or simply enjoying seasonal beauty, these charming boards are sure to make you smile. Gather your materials, unleash your creativity, and let the spirit of fall inspire your next DIY project. Trains, Tracks, and Endless Possibilities!


Comments